🔗 Introduction #
To send messages using WhatsApp through Chati, you must first connect your WhatsApp Business number via Meta’s Embedded Signup flow. This process is quick, secure, and directly powered by Meta Cloud API let’s connect whatsapp Number to Chati.
⚠️ Important: Before starting, ensure you meet the prerequisites listed below.
🧾 Prerequisites Checklist #
Before clicking “Connect your Number”, please ensure you have:
- A Meta Business Manager account (or access to one)
- A verified business email and phone number
- Permission to manage WhatsApp Business settings (admin access)
- Your Facebook Page (optional but recommended for profile linking)
🚀 Step-by-Step Guide to Connect WhatsApp Number #
🔘 1: Click “Connect your Number” #
To initiate the process, log in to Chati and navigate to the WhatsApp setup section. Click on the “Connect your Number” button.
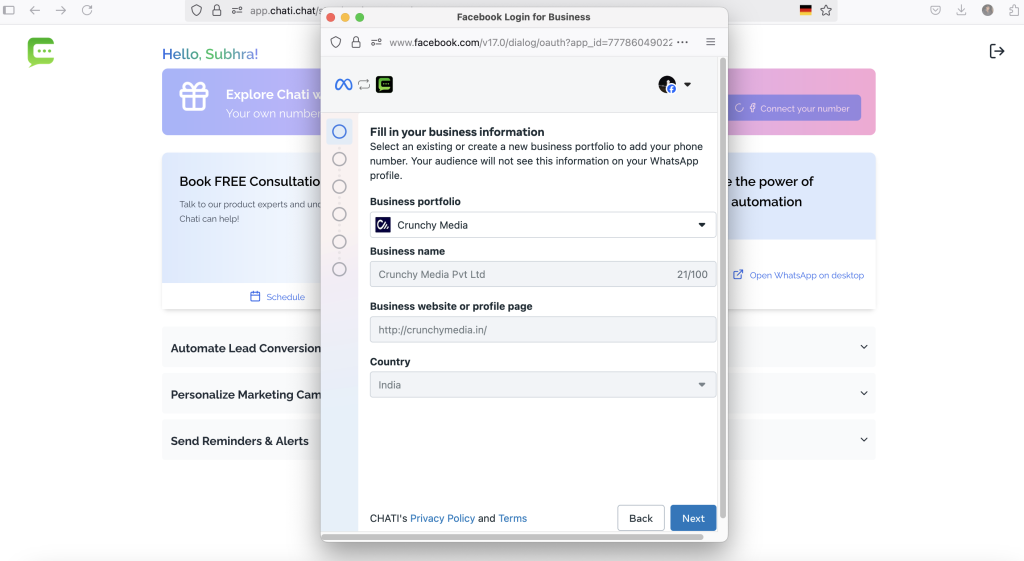
🏢 2: Fill in Your Business Information #
Meta will prompt you to log in with your Facebook account. After logging in, provide your business name, website, and email.
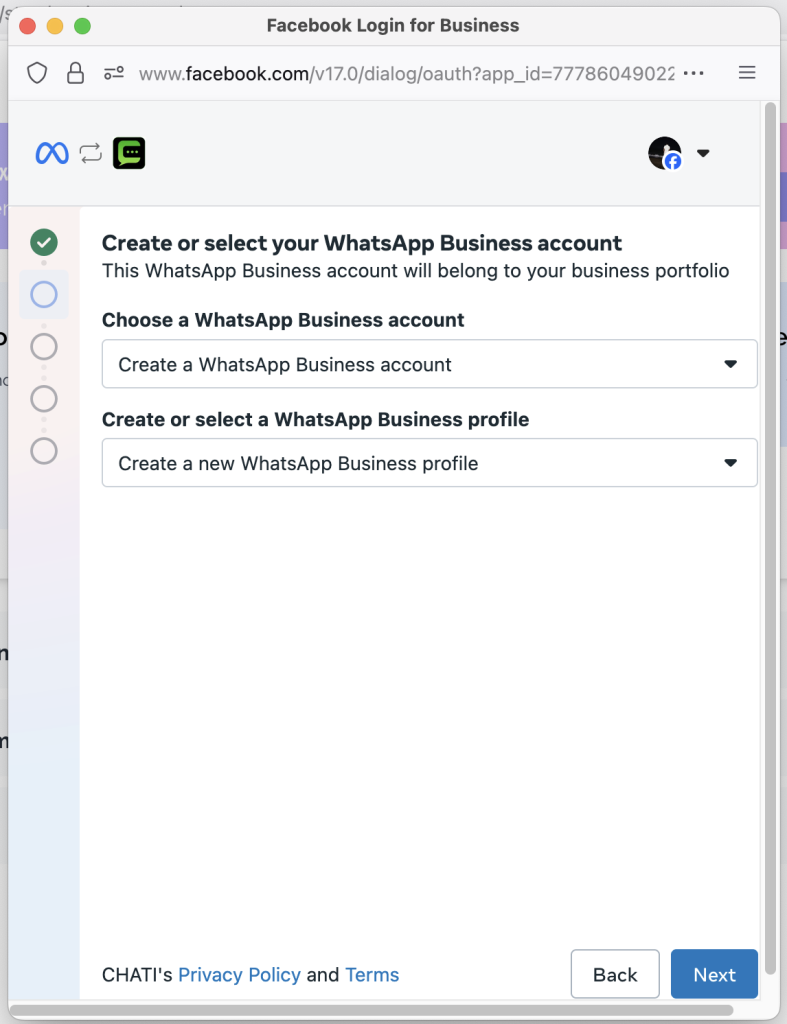
🧾 3: Choose or Create Your WhatsApp Business Account (WABA) #
You can either select an existing WABA or create a new one under your Meta Business account.
📝 4: Create Your Business Profile #
Enter your Business Display Name, Category, and Business Description. This information will be visible to users in your WhatsApp business profile.
📲 5: Add and Verify Your WhatsApp Number #
Enter the phone number you want to connect and verify it using a 6-digit code sent via SMS or phone call.
⏳ 6: Wait for Account Activation #
Once completed, your WhatsApp Business Account will be created within 3–5 minutes. You can then begin using Chati to send messages, set up templates, and automate responses.
🎉 You’re All Set!
Once your number is connected:
Access advanced features like broadcasts, segmentations, and contact syncing.
You can start creating chatbots, templates, and workflows.


